Thursday, June 2, 2016

Cultured Butter


IMG_1203

Making cultured butter was a bit of an experiment with me that I went at thinking I would try it just once because it sounded too hard and complicated.  Well, it wasn’t as hard or complicated as I thought and it is actually something I think I will do again.  I had gotten some cultures to use for fermenting and they had mentioned making cultured buttered which really got my attention.  I had never heard of it and after searching for it in my local stores couldn’t even find it.  When I did at a health food store it was quite pricey.  Finding clear directions was another challenge so after collecting recipes from several sources I put together something that worked for me.  First I had to culture my cream.  I used the culture I got from Cultures for Health.  I used the Body Ecology starter Culture.

Homemade Cultured Butter

4 C. heavy cream

1/2 C. yogurt or 1 culture packet

1/4 tsp. fine sea salt

1.  Heat cream to 77 degrees.  Add starter pack or yogurt; mix well.  Place in canning jar with a coffee filter or cheesecloth over the top to let it breath.  Culture on counter for 12-36 hours.   It should thicken and taste rich and tangy.

2.  Cover and refrigerate until it cools to about 60 degrees.  This should take about 1-2 hours. 

3.  Line a fine mesh sieve with a double layer of cheese cloth and place over a large bowl.

4.  In the bowl of a food processor or a mixing bowl with a whisk attachment process until the curds separate from the buttermilk and turn a nice butter yellow color.  I did this with my mixer and it does splash a lot so use the shield next time I will try the food processor it might be less messy.

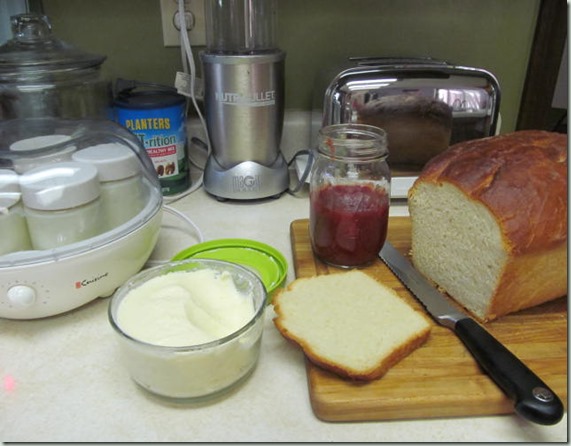
5.  Pour this mixture through the sieve and let sit for 1-2 minutes letting the liquid drain from the curds. Then gather the butter in the cheese cloth and gently squeeze out as much of the butter milk as possible.  Save the buttermilk in another container to use for other recipes.  I made homemade buttermilk bread to test our new butter on with a fresh batch of strawberry jam.

6. Wash the butter by pouring ice cold water over it and squeezing it out more.  Continue adding water, washing, and pouring off the liquid until the water runs clear.

7.  Wrap and form butter as you wish.  I stored it in a glass container in the fridge.  It will last about a month (if you don’t use it before that) in the fridge.

*you can find more information about this at this website:  Recipes for Health

This was a fun and rewarding experiment and we used up the bonus buttermilk right away and could have used more so I am pretty sure the will be more butter making in our future.

Enjoy the good things in life!

ferne

Wednesday, June 1, 2016

Homemade Yogurt

IMG_1203

I have been eating yogurt for lunch for years and am often teased about it, but I love it.  After reading labels on many brands and types of store bought yogurts and finding way too much sugar in most, I tried my hand at making my own a few years ago.  I was a bit disappointed in how runny it always was and sometimes sour and resorted to buying store bought yogurts again.  Recently I decided to give it a try again and have fine tuned my favorite recipe with great results.  I have tried 2 very different methods with very different flavors and results.  The first was a mesophilic yogurt and there are several cultures available for this type at Cultures for Health.  I bought a pack that had 4 different types and have tried 2.  This yogurt doesn’t require any cooking and is made sitting on your counter for 12-48 hours.  The time varies depending on the temperature in your home.  The first culture I tried was Viili, it is a bit of a runny yogurt, but great to add to smoothies and fruit for popsicles.  Next I tried Filmjolk and found that it set up nice in about 48 hours and had a bit of a tartness that made it great as a sour cream substitute.  These cultures are so easy to use and require very little time to mix up.  This is made with no sweetener just a good whole milk.  I like to find an organic milk when possible.  Pour milk into a clean canning jar; add some starter and stir.  Then cover with a coffee filter or cheese cloth to keep the bugs out.  Use a rubber band or metal jar ring to hold in place and let set.  To check if the yogurt has formed just tilt jar slightly and see if it is pulling away from the jar like a thickened yogurt.  Then refrigerate for about 6 hours before eating.  The refrigeration stops the fermenting process.  Remember to save some for your next batch!  You can keep your culture going as long as you make a new batch about once a week.  Add 1 tablespoon of cultured yogurt to every cup of milk to continue for the next batch.

My favorite yogurt takes a little more time and some cooking, but I have been getting really good results.  It seems to be all about temperature here and good ingredients.  Here is my recipe:

      4 C. whole organic milk

      1/4 C. sweetener (can use honey, sugar, and more)

      1 tsp. Vanilla

      2T. cultured yogurt or yogurt starter from your first batch.  *I experimented with using Fage Greek Yogurt as a culture with very good results.IMG_1202

Heat the milk and sweetener to 180 degrees, don’t let it boil.  Keep it at this temp for 20 minutes by stirring constantly.  Add vanilla.  Cool to 110 degrees.  You can speed up the cool down time by setting pan in a sink with cold water.  When it gets to 110 degrees mix a small amount with your starter then stir into the bigger batch.  Put into jars.  I use a yogurt maker and it has special jars that fit in it so I use those. 

I have found that my Excalibur that I use for drying fruit holds a perfect 110 degrees and makes great yogurt in larger batches.  You will keep it in the yogurt maker (or Excalibur) for 5-8 hours checking occasionally to see if it has set by tilting a jar and seeing if it is pulling away from the side of the jar.  I am finding that 6 hours has been working pretty good for me.

I have been experimenting with cultures using this method and have recently found Bulgarian yogurt to be my favorite with Greek yogurt made with Fage as my culture to my next favorite.  Mix in any of your favorite fresh fruits and enjoy!

Eat healthy and enjoy feeling great!

ferne

Thursday, May 26, 2016

Adventures in Preserving

IMG_1187

As we enter a new gardening season I have a renewed hope for a bountiful harvest of fruits and veggies coming from our property this year.  I have been researching methods of preserving it all so I don’t waste a morsel and I am hoping to share it all on this blog.

I started by listening to podcasts by Theresa Lowe of Living Homegrown.  Each podcast is about a half hour which is about how long my drive to work is so the timing is perfect.  Theresa also offers an on-line class called The Canning Academy which I have almost completed.  There is a wealth of information that can be printed out from there also.  Some things have changed since the days of watching my Grandmother do all this for safety reasons and also new technology so it is good to have her guide me as I get started on this new adventure.  I am really not totally new to canning, but some things I did because that is all I knew and now I am equipped with a whole lot more information from a reliable source.  The Living Homegrown website introduced me to fermenting in one podcast.  In the past I thought fermenting was just how you made sauerkraut and I liked sauerkraut, but not enough to actually make it.  Well, I now own a Kraut Source and have made several batches of different fermented foods including strawberries.  My first batch though was with kale I grew and added some cabbage and carrots and more and it turned out a very tasty sauerkraut unlike anything I have tried from the grocery store.  I can’t wait to do more fermenting and canning.

I have been making my own yogurt also.  I made a few batches in the past, but gave it up because it was always runny and sour tasting.  Well, after listening to one of Theresa’s podcasts on making yogurt I found Cultures for Health and got a culture for a mesophilic  yogurt that you can make with no effort in a jar sitting on the counter for a day or two.  It was a lot less sour, but still runny.  It was great for smoothies and I have some popsicles in the freezer from that batch.  I got inspired though to try my hand at other yogurts though and have since had great success at some cooked variations using different cultures from Cultures for Health and even Fage yogurt for my culture.  I want to keep my posts on all this subjects short so I think I will divide the topics and cover yogurt with my recipe in more detail in another post.

As things go when you are hoping around on the internet ‘researching’ I stumbled upon a link to a new book just coming out called Batch by Joel MacCharles and Dana Harrison.  They spent 3 years putting this book together.  They are in Canada and I am so glad that I found them because their book and Facebook page called Well Preserved, have inspired me so much.  The book was just released about 3 weeks ago and I got my copy right away from Amazon.  It is so well laid out alphabetically by produce with recipes of how to use what you can, ferment, infuse and more.  They even cover salting and smoking.  The few days leading up to the release of their book they were doing some short videos on their Facebook page using some of what you would find in the book and it was very helpful actually seeing it done.  Joel made everything seem so simple.  He likes to make things in batches so when you are cutting up strawberries for a jam throw some in a jar with a few extra ingredients and ferment them or I added some in a jar to my Braggs vinegar and a few days later I strained them out and had a tasty vinegar to add to dressing and drinks.  I even found it was great to add to fresh berries to eat with my yogurt.

There is a whole new world in food opening up to me and I hope to many others as we grow our food and find new and exciting ways to use it.  I have so much more to share here on my blog…

more to come…keep it growing!

Ferne

Friday, May 1, 2015

Soil Nematodes

In looking back at my blog I see that I am not posting very regularly and if I have any followers left I have to apologize.  Writing a blog post takes a lot longer than posting to Facebook, but on the upside I can get a lot more information in a blog post.  I have set up a Facebook page for Hummingbird Farmz where I keep track of gardening happenings in our little homestead.  You can follow me there by liking us at this site Hummingbird Farmz.

Growing Thymes HF5 copy

The topic I am devoting this blog post to is soil nematodes.  I am no expert on this topic, but we are learning more and more everyday as we struggle with damage caused by some bad guy nematodes that like to eat at the roots of some plants causing the plants to be stunted and slow down production by a lot.  The worst part of this problem is that you never see the little buggers or the damage until you pull up the plant and look at the roots.  I thought I had taken a picture of the damage I found recently on my chard, but I can’t find it so I am borrowing a picture of nematode damage on a tomato plant.  This Rodale article describes what is happening best…it seems that the nematode has a sharp mouth that it uses to puncture the plant cell and suck the juices, the saliva it injects into the plant causes the swelling.  While most nematodes are beneficial these little Root Knot Nematodes are not.  They travel well in sandy soil, which is sort of what we have here.  We live near a lava tube near Mt. Lassen and our soil is mostly lava rock dust.  It is easy to dig a hole for planting, but it is also easy for these guys to find the roots of the plants they love.  There are some things they seem to like better than others ie., tomatoes, cucumbers, peach tree, chard, kale and many more. 

In gardening there are many problems and just as many solutions.  I have found many sites that recommend adding lots of compost to help combat this problem.  We are planting all nematode resistant varieties of tomatoes this year and there were lots available at Totally Tomatoes and Tomato Growers.  The downside is that I love heirloom varieties of tomatoes and have had to pretty much forego those this year.  I am planting a few in 7 gallon nursery pots with compost and potting soil.  We are also experimenting with Actinovate AG as a soil drench, it is organic, but my concern is that is killing more than just the one targeted pest and taking some good guys with it.  After having dug where it has been used though I am still seeing some worm activity so that leaves me hopeful that it isn’t killing everything.  It seems that root knot nematodes are only 1/50 of an inch long so there is no way to check on their population without a microscope.  My tomatoes and egg plant have been planted in what seems to be the most heavily infested bed.  It has been treated monthly for a few months with the Actinovate and I added lots more compost and diatomaceous earth to the soil at planting time.  I am planting lots of French marigolds one is even called Nemagold marigold, it seems that their roots deter this nematode creating an environment they don’t want to be in.  One more link full of good info comes for UC Davis…Nematode Management

If you find that your tomato plants are wilting and or turning yellow early on you may be thinking that they have early blight or some other problem, but when you pull them out check the roots they may be suffering from root knot nematode damage.  There is not a lot of information out there, but it does seem to be a problem that more people are becoming aware of and more solutions are being talked about and experimented with all the time…so don’t give up on gardening just yet, we can’t let this tiny microscopic critter win!  It is just one more hurdle for a gardening to jump to get good food to the table…

we can do it!

Friday, May 30, 2014

Garden update

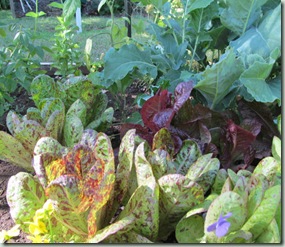
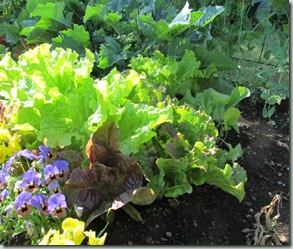
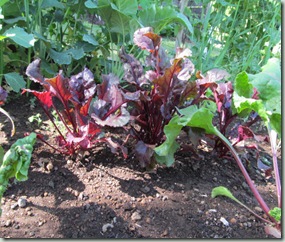
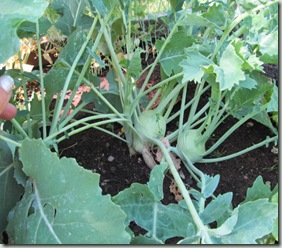
IMG_0368 May is coming to an end…sad for me because May is always my favorite time in the garden, things are always looking so fresh and promising after a little rain and warmth hits the soil.  This year we built our raised beds up with deeper and stronger boards and added lots of compost rich soil which is producing plants with good strong stems and deep green leaves.  One of my favorite things to come out of my garden this May was all the lettuce, beet greens, beets, peas and kohlrabi.  It has made for some great tasting salads every night and I do feel healthier for it.  Oh, how I have loved those varied colors of tasty lettuce, but now they are beginning to bolt and go bitter from the heat so they will soon be pulled and replaced  with something undecided as of yet.

IMG_0362IMG_0363


IMG_0361IMG_0364


IMG_0367


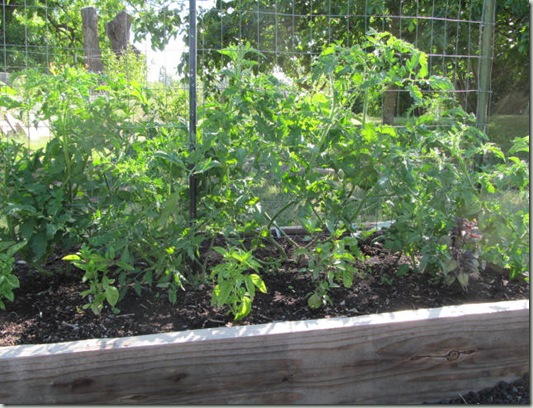
June should be a month when we can start to reap the benefits of our love and labor in the garden.  The strawberries are starting to produce tasty fruits along with a few of the raspberries.  The first crop of figs are ripening as I write this.  I am seeing baby squash on the squash plants and I even spotted a few green tomatoes on the vines.

IMG_0366

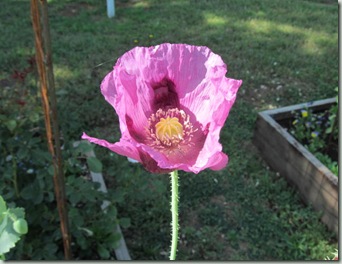
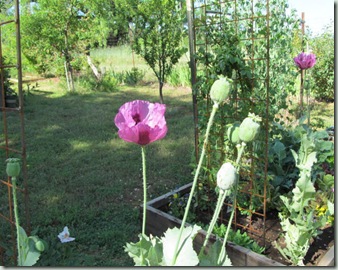
Some Facebook friends started posting pictures of their beautiful poppies so we had a lot of fun bombing Facebook with our flower pictures every day.  Mine is a Zahir poppy which I grew from seeds from Redwood seeds, a local seed company.  I am anxiously waiting for the seed heads to turn brown and dry so that I can harvest the edible seeds inside.  I always have a jar of fresh poppy seeds for baking.

IMG_0369

I am trying my hand at growing Quinoa this year.  It is a grain that I am learning to enjoy cooking and eating.  Watching this crop grow I can see that I really didn’t plant enough.  If I enjoy it I will be changing that for next year.  Several people have told me that it is a lot of work to harvest so we’ll see how I feel about it after harvest time.  It has been real interesting to watch it grow though.

 I am hoping that others are experiencing the joy of growing their own food and from the looks of our vegetable and fruit tree sales at the nursery I can safely say that there are many that are trying their hand at it.  I don’t think there has been a day this season that someone has not said to me that this is their first time to try growing a food crop.  I hope that they all have a good experience and will keep at it for many years to come.IMG_0370

Ferne

Saturday, May 10, 2014

Growing Methods for 2014

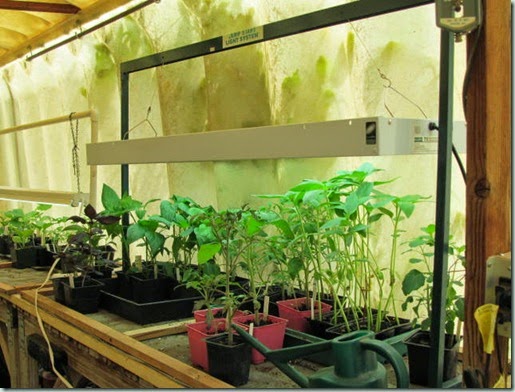
It seems that as we garden we are always trying something new and different.  I have been keeping lots of notes on what I try new each year and then before planting I reread my notes and make adjustments.  This year we splurged on a new grow light after needing to replace our old fixture yet again.  We keep buying shop light fixtures and grow light bulbs, but they just don’t seem to last.  So this year we got a new Jump Start 4 foot light that has 4 T-5 bulbs and we are very happy with it.  The stand we are using is an old one and not made for the heavier weight of the new light fixture so we should probably invest in a new stand for next year because it was very difficult to adjust the height of the light fixture without 2 people.  The new light did seem to make a big difference, it spread out over a larger area and never got hot.

IMG_0313 I did stick with my homemade seed starting mix from last year and loved the results so I will repost that recipe here again.  I found this recipe on line at About.com, it drains so nicely and I have great results using this recipe.

Basic Seed Starting Mix

  • 3 parts** peat or coir (coir is preferable if you can get it)
  • 3 parts vermicompost (your own or purchased from a garden center or other supplier ~ Worm Gold)
  • 1 part perlite
  • 1/2 part greensand

First you have to soak the peat or coir and let it get nice and moist then start adding all the ingredients in a bucket or wheelbarrow.  Mix it very well by hand.We fertilized the seedlings with Kelp and Sea Weed Extract about once a week. 

We started 23 varieties of tomatoes mostly seeds left from previous years, but we did purchase a few new ones.  My favorite was Geranium Kiss tomato with foliage that really looks like a geranium leaf.  It will only get 2 feet tall, but from what I have seen on line it will produce a lot of clusters of pretty large size cherry tomatoes with a little tiny point at the bottom.  Can’t wait to see that.IMG_0126 This year new raised beds were built to make them 12” tall instead of 6” so more soil had to be brought in to fill them up.  We found a nice mix that had some mushroom compost, steer manure and rice hulls along with other things.  We have also added a lot of our own homemade compost from the big bin.IMG_0308

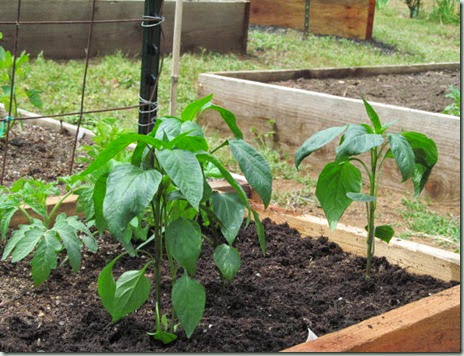
We didn’t plant as many varieties of peppers though, but I did try something I don’t usually do, I pinched the tops several times and I love the results.  They have branched out and gotten very full.  I also turned the heat mat up to about 75 degrees until about two weeks before planting then I turned it down to 65 and let them harden off a bit.  The day they were planted we got a heavy downpour of rain and I was so afraid I would go out to see them all broken off and sad looking, but they held up really well and a few days later it seems they are even growing.  This week’s forecast is calling for a hot spell which should get things off to a good start.  A new pepper I am anxious to try this year is Chablis, it is a thick walled sweet pepper that has multi-colored fruits.

Can’t wait to post more progress in this years garden.  There is so much more I want to document here, but I will save that for another post!

Ferne

Sunday, October 6, 2013

Hummingbird Farmz First Press

IMG_1582 

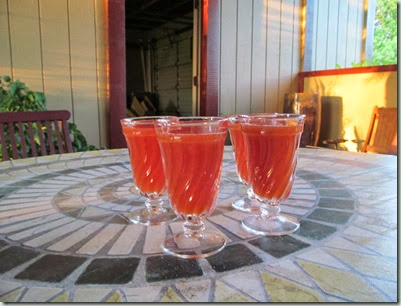
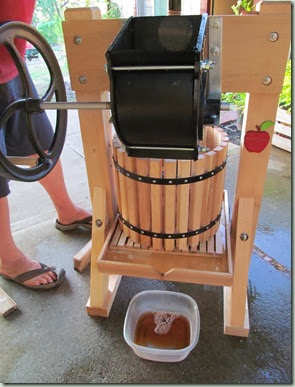
This year we finally had quite a few apples to harvest which justified the purchase of an apple press.  We hope to put it to good use in the future and have discovered that it works well for more than just apples.  We christened it with a mixed batch of apples from our orchard and got 4 wine glasses of juice, enough for a toast to Hummingbird Farmz success.  We also used it to make some pear juice and even grape juice later.  I think this is going to be quite a handy tool and nice decoration too.IMG_1581

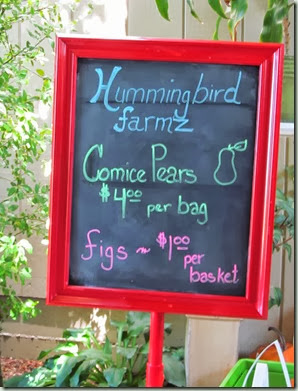
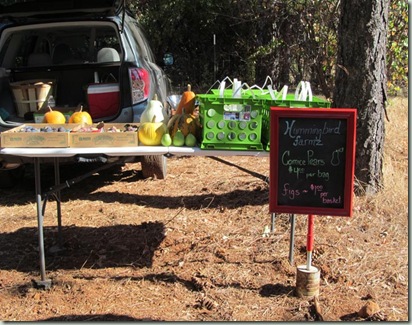
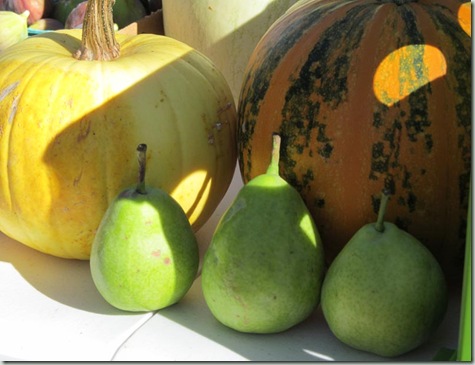
IMG_1630We also took our pears and figs to a little market for the first time.  It was good practice to figure out just what we needed and got us talking to people about what we will have in the future.  Giving out samples for tasting was our best idea, one taste and they wanted more.  We met several of our neighbors who have been watching our little orchard grow and they are anxiously awaiting tastes of those heirloom apples.  The laws in California have changed now for what you can sell from your home kitchen and I am planning to go through the process so that I can sell some of my jams and jellies in the future.  Some fruit has such a short shelf life fresh that processing it makes for a product that you can sell for a much longer period of time.  Figs are one of those, they only last a few days off the tree and about a week refrigerated.   I made fig jam and balsamic figs that were delicious and last up to a year when processed properly,  You IMG_1631can also sell baked goods as long the ingredients are listed on the label along with your certification number and the process to get certified is not really hard, but there is a fee, of course, which I think will be worth it next year.


See you at the market!

Ferne

  IMG_1633